
AWS AppFlow is a fully managed integration service provided by Amazon Web Services (AWS). It enables you to securely transfer data between various software-as-a-service (SaaS) applications and AWS services. AppFlow simplifies the process of building data flows by automating the data transfer process and handling the underlying complexities.
AWS AppFlow supports integration with a wide range of popular SaaS applications such as Salesforce, Slack, Marketo, ServiceNow, Zendesk, Snowflake, Microsoftsharepoint and many more. It allows you to easily connect and transfer data between these applications and AWS services.

                    Replace  with your S3 bucket name
{
   "Version": "2023-05-1",
   "Statement": [
       {
           "Effect": "Allow",
           "Action": [
             "s3:PutObject",
             "s3:GetObject",
             "s3:GetObjectVersion",
             "s3:DeleteObject",
             "s3:DeleteObjectVersion"
           ],
           "Resource": "arn:aws:s3::://*"
       },
       {
           "Effect": "Allow",
           "Action": [
               "s3:ListBucket",
               "s3:GetBucketLocation"
           ],
           "Resource": "arn:aws:s3:::",
           "Condition": {
               "StringLike": {
                   "s3:prefix": [
                       "/*"
                   ]
               }
           }
       }
   ]
}
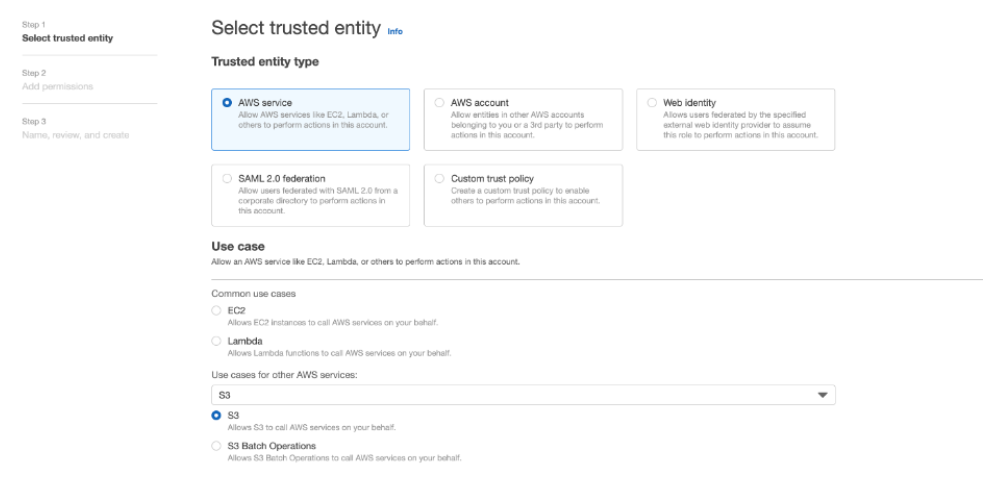
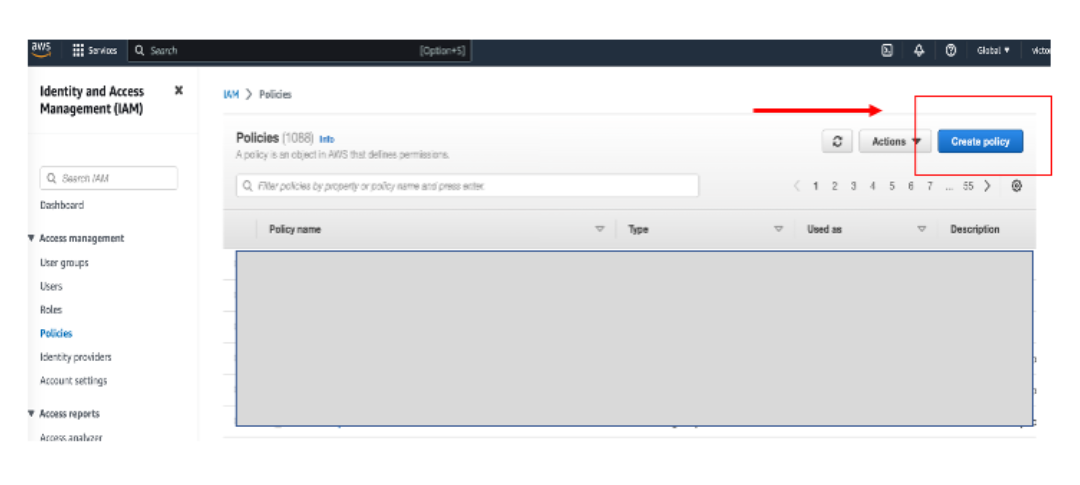
Make your selection based on account you would like to use and select S3 I as use case. Click next to policy. Select the policy you have created in above step.Go next window and click on Create role to finish role creation .
We will back and make changes on trusted entities for this role after Snowflake integration setup.
Login with ACCOUNTADMIN role and create integration
                        CREATE STORAGE INTEGRATION <>
 TYPE = EXTERNAL_STAGE
 STORAGE_PROVIDER = 'S3'
 ENABLED = TRUE
 STORAGE_AWS_ROLE_ARN = <:role/>'
 STORAGE_ALLOWED_LOCATIONS = (<>>)
Login back to AWS console and navigate role which you create on Step IAM Role.
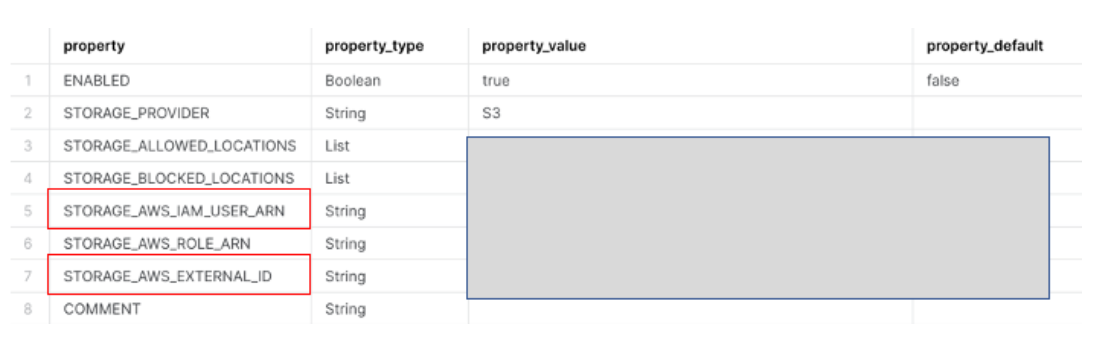
Click on Edit trust relationship. Modify below json with values noted in step 6
                            {
 "Version": "2023-05-1",
 "Statement": [
   {
     "Sid": "",
     "Effect": "Allow",
     "Principal": {
       "AWS": ""
     },
     "Action": "sts:AssumeRole",
     "Condition": {
       "StringEquals": {
         "sts:ExternalId": ""
       }
     }
   }
 ]
}
CREATE STAGE <>
 STORAGE_INTEGRATION = <>
 URL = '<>
10 . Create a ACCOUNT table on snwoflake
create or replace TABLE ACCOUNT (
ID VARCHAR(18),
ISDELETED VARCHAR(5),
MASTERRECORDID VARCHAR(18),
NAME VARCHAR(255),
RECORDTYPEID VARCHAR(18), ..... )